Monday, March 26

Cleaning Out the Fridge-a-Tator

Well, it all started out with half a red pepper, some fresh('ish) mozarella, zucchini, and ricotta that was nearing the every end of it's consumable life.  I absolutely hate how much produce I end up throwing out because it went bad too fast.  It happens super duper fast (at least in my opinion) up here.  I guess the food takes a while to make it all the way up to AK?  Anyways, I had some frozen spinach I bought about a month ago with a spinach pizza dough in mind, which got the wheels spinning, and figured what a perfect way to make-do, in the spirit of Nathania & Sarah's Make-Do-March, by making do with whatever food (especially of the needs-to-be-eaten-asap) I had in my kitchen!

I took one picture [gasp!  how horribly un-Krista-like!] and it was an iphone picture.  Sorry...

For the dough, I used this recipe:
  • 3 cups white flour
  • 2 ¼ tsp active dry yeast
  • 1 tsp salt
  • 2 tbsp sugar
  • 1 10 oz. Package frozen spinach, thawed
  • ¼ cup warm water
  • 2 tbsp olive oil 
And did the following:
  • Preheat oven to 400 degrees Fahrenheit. (I bet you could do hotter...)
  • Dissolve yeast in ¼ cup warm water and let sit for five minutes or until foaming.
  • Using a blender or immersion blender, pulse the thawed spinach with juices until half-way pureed - except I got frustrated and said screw it, I [will] like chunky spinach in my dough...
  • In a large mixing bowl, stir together flour, salt, and sugar.
  • Add pureed spinach and olive oil followed with the yeast/water mixture. Stir until fully incorporated and proceed to knead until mixture is elastic – about 10 minutes. - OR be like Krista: remember you have a food processor and make your life easier using the nifty little dough button.
  • Cover dough and let sit for 20 minutes. (or closer to an hour while you go grocery shopping...)
  • Roll dough out (or if you're feeling lazy and don't want to clean off and flour an area for the rolling pin, stretch it out pretending you're an Italian chef of sorts, but without the throwing of the dough, that could result in a sticky spinach doughy mess in locations other than your pizza stone...) and top with pizza toppings. Bake for 15-20 minutes in 400 degree oven. (it took me more like 25 min I think...  just look for that nice golden brown to show up on your cheese and peppers)
And this is what I put ON the pizza (in the order I put it on):
  • Ricotta cheese (I think I had about a 1/2 cup left) with some black pepper ground in
  • Crushed/minced garlic cloves (4 - but I like my garlic)
  • Shredded zucchini (2 small) ala cheese grater
  • Shredded mozarella  (approx. 1/2 c. that was left)
  • A smattering of goat cheese, crumbled
  • 1/2 Red pepper, cut up.
  • I didn't add this, but I bet roasted garlic cloves would have been a nice addition...
That's it.  Super fancy?  No.  BUT it made use of the things that were beginning to waste away in the fridge.  So instead of making it into the trash in no less than two days... the on-it's-last-legs food made it into my stomach (and Kevin's, and a little in Rudder's) and I have plenty more for 3 servings of left overs.  The dough turned out kinda thick (perhaps this is why you should roll it), and I think could have maybe been a little less fluffy (not bad fluffy, but definitely not thin crispy!)

Ok, I'm procrastinating on report writing (I deplore having to do work at home past 10pm...) and just wanted to join Sew Dutch's Link Up Party.  :o)  Back to work...

Saturday, March 24

Onesie and Twosie More

Well it only took me [over] three months to make something for my favorite [nearly] three month old!


I bought a plain white onesie, some remnant fabric, sticky stuff from the sewing section [so technical, I know], and embroidery floss to make Hunter's baby shower gift back in December I think...  Fast forward to 1.7.2012 and Hunter is born.  Onesie supplies are still in the closet.  Fast forward [quite a bit] to 3.24.2012 and FINALLY the project is started and completed!  It didn't even take that long to make today...  Sorry Shelly & Hunter!  Although, I doubt Shelly will be surprised seeing as I still have her wedding gift...  Timeliness in gift giving isn't necessarily my forte...  :o/

Alrighty, so Shelly is one of my most favorite people in the world and a fellow snap-happy kid.  I think we took over 5000 pictures on our cross-country road trip.  Sound like a lot?  I was actually expecting to have taken more...  Thank goodness for digital or I'd be in debt from film and development...  Back to the point.  I made an appropriate onesie for the baby of a snap-happy mom.  Here's how I did it:

Step One: Find a friend that will make sure you don't get distracted by other projects.

Step Two: Turn on a fantastic movie such as Bedknobs and Broomsticks [if B&B isn't available, try Chitty Chitty Bang Bang as an acceptable replacement]
Source: Disneylicious
Step Three: Um iron, especially if you've kept your onesie and fabric [after they've been washed] haphazardly in a bag.


Step Four: Cut out appropriate size squares of the fabric and sticky stuff for the camera - Iron together per package directions.


Step Five: Free hand the outline of a camera to cut out.

Step Six:  Cut cut cut!  [bonus points if you can rest said cut out on a dog's head for picture taking purposes]

Step Seven: Give the dogs some attention because they look oh so pitiful and/or are acting like hippopotami on crack...


Step Eight: Back to the project.  Peel off the paper backing from your cut out camera, and iron (per package) onto onesie in a drool catching location [don't worry, this camera is fairly waterproof].

Step Nine: Embroidery time!


Step Ten: Admire the work you've made and take pictures of it for the blog.  Use your left hand to push dogs off of your work and keep their nose out of the lens.

Just in case you can't read it, it says "assistant"

Step Eleven: Write incessantly about it on your blog because you can (and because you're avoiding the cleaning that needs to be done - hey I'm honest).


Now for the Twosie more

I also accomplished two more other (albeit smaller) projects in this four hour time span.  Yay!

First was fixing my poor little mitten.  I LOVE these mittens I got this fall from REI (on sale naturally).  They're convertible (perfect for picture taking and dog wrangling), fun colors, and warm!
 Alas, the thumb of the left mitten is falling apart.  :o(
Um, not quite so warm this way...

What it used to look like.

Yikes!

So I have NO IDEA what I'm doing.  But I had blue yarn that was the same color scheme, and a crochet hook...

So I figure heyyyyyyyyy, I'll just give it a whirl...


And this is how it turned out.  Prettiest thing in the world?  Not even close.


 BUT!  It works!  Hopefully this well help keep the frays away...
And what's a project without dog interference...


The other little project I got done was fixing a little tear in one of Kevin's [super soft, awesome colored] shirts.  
Not perfect, but not so noticeable when it doesn't have a camera zooming in on it ;o)


On a side note, I got two AWESOME vintage books at Value Village today for 99c each!  I love love love old books.  Love.  One is Alaska in Transition (1960) and the other is a small textbook on Human Behavior (1960s'ish).  Both totally up my alley because 1) Alaska theme 2) Human Behavior = my life as a psychologist.  There was a sociological theory textbook there as well (it was a chunker) that I may or may not have squealed over [just a bit] when I saw it...  But it was $10, and I'm going to cross my fingers and hope nobody else is quite as excited about social theory as I am, and that I can get it for a percentage off later.  I also put back a REALLY cute 1970s mug with owls on it (cute kind, not scary) that was 49c - because I DIDN'T NEED IT.  Liked it a lot?  Yes.  Need it?  No.  Sigh...  Trying to be better about stuff like that.


Thursday, March 22

Sushi & a PUpdate

Oh puns, you never get old... ;o)

So, I've been hoarding pictures of mi casa and projects I've been doing lately.  Well intentioned to stick them up here on the blog, and yet they still sit untouched in a file on my desktop.  They'll end up here someday [maybe] [hopefully].

Anyways, Kevin and I made sushi for dinner a while back (gosh, I guess it was almost 2 weeks ago now!) and I took pictures.  Turns out it was way easier than expected and a pretty cheap dinner!


You can really put whatever you want in these I guess, but we weren't feeling brave enough to deal with raw fish (I'm more than happy to leave that to people who know what they're doing!) so we used imitation crab meat (cheap), some fresh veggies (zucchini, cucumber, red pepper), a little bit of cream cheese in some, and jasmine rice.  [Sidenote: Kevin is somehow a master rice maker... no burnt rice on the bottom of the pot!  Unlike every time I make rice...]

So all of the veggies were cut up into thin strips, rice in a bowl (nice and sticky, no rice vinegar necessary!), and wax paper out.  Yeah, we had to use wax paper.  As a first time sushi maker, I didn't have the nice little bamboo roller mat things.  I do now (woo hoo Target super clearance 2 days later!)!  Anyways, put the Nori (shiny side down) on the wax paper and press the rice onto the Nori, leaving an open strip for sealing it at the end.  Lesson learned from first sushi roll: Press that rice down nice and hard - your chopsticks will thank you later.
Lay your veggies out in a row, nice and close together.  Put what ya like, how you like.
I let Kevin go first so I could watch (and photograph) the rolling of the sushi, being a sushi-making newbie and all.  Pretty easy, even without the bamboo rolling mat thinger-ma-bobs.  Again, push down that rice so that this creates less mess and more compressed sushi!

And voila!


Sushi!

It was yummy. 
My sister and I even ate it mid-hike/ski!


It was a BEAUTIFUL week up here for Spring Break.  Jana (aka "Sherpie" for her amazing sherp'ing abilities) came down to Anchorage for a few days.  We went out to one of my favorite places ever - Hatcher's Pass.  Beeee-uuuuuuuu-t-i-fullllll!  Anyways, this was the "yeah, you can skate ski this trail [um, bull Sherpie, total bull]" &"%$(#)* Moose!!!" outing.  Yeah, that moose was a pain just chilling in the middle of the trail and consequently making skate-ski clad me have to take off the skis and post hole around him while hoping the dogs totally missed the whole moose factor.  Again, I say %$(#* Moose.  Here are some pictures from the trip:


Survival pup - can dig you out when you get stuck in deep snow.


Tired pup - A rarity in my life
And now for a mini-gag reel:


MMMMMMM Sticks!

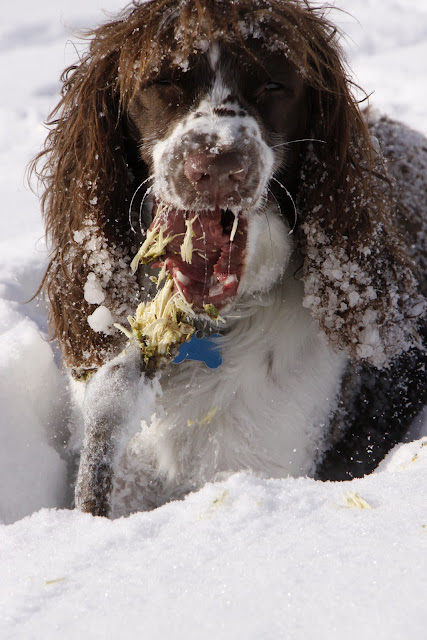
He may or may not be the cause of deforestation and lakeshore erosion in Alaska...


And just to keep this blog post RANDOM... 

You too can enter a giveaway over at the Sew Dutch Sisters!  :o)  Full of great make-do'ing, craftiness, and deliciousness!